
Blister Business
Well, now that’s a deep subject. We finally got all our window holes sealed up, thank goodness! It ended up being quite a gooey mess of a (half) failure. Erik is meticulous with detail, and the prep work to make the thru-bolts sit flush on the exterior of the boat involved a bit of dremmeling, widening the thru-bolt hole, matching thru-bolts threads, basically thru-bolts are needy attention seekers! We were very thorough with these details when installing the new old window, and while the silicone was a mess the installation was a success. I began pack up as it was 4:30 and I knew the sun would be setting soon (Darn You WINTER!) when Erik looks at me and asks if I wanted to go ahead and finish the second one, to which I replied nope, but we did it anyway! Because we were rushed we did not give the thru-bolts the attention they needed and basically they refused to cooperate. So we had to do a take 2 on that window (after cleaning the gooey mess) but we finally have the 2 windows and hatch all battened down. Erik was in the boat when it was raining and said nothing leaked! Phew! Now for the other 8 windows…. they currently sit on the bottom of our priority list and we will probably attempt to fix them as needed (what’s leaking the worst) and hopefully while we are actually cruising.
Now we can focus on matters at hand: our boat out of the water! I got Erik a random orbital sander (for an early X-mas gift) and he is using that to sand off the old bottom paint. 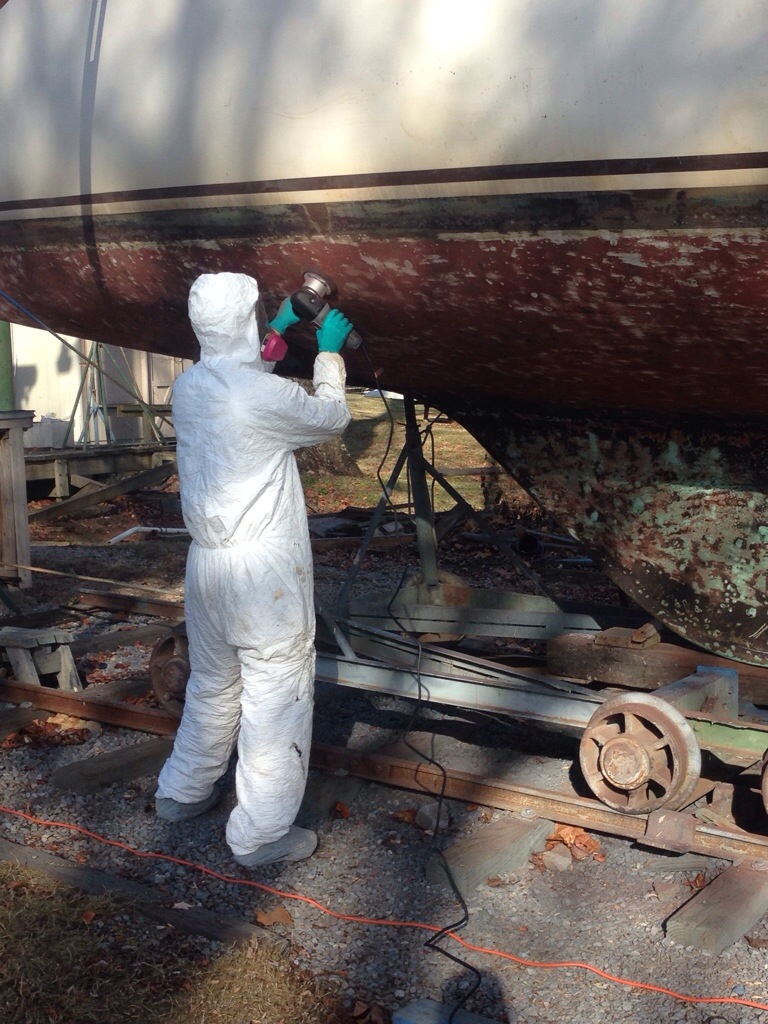
Once he got a good bit of paint off, it was much easier to see the blisters. Osmotic blistering is common on old sailboats, it’s basically when water gets between the gel coat and fiberglass, and creates a void. Blisters are solely cosmetic the majority of the time, but while we have the boat out of the water for so long, Erik is going to try his best to correct these blemishes.
I have just returned from a Thanksgiving mini-vacay from Clarksville. I got to hang out with Dad and relax and enjoy good food, and while I invited Erik he chose to stay in town and capitalize on his “days off” to work on the boat. He has spent hours upon hours dremiling and sanding and it’s great to see so much progress. Erik says he is “rushing now so he won’t have to rush later” but something tells me if it’s not one thing, it’ll be another. Alas.
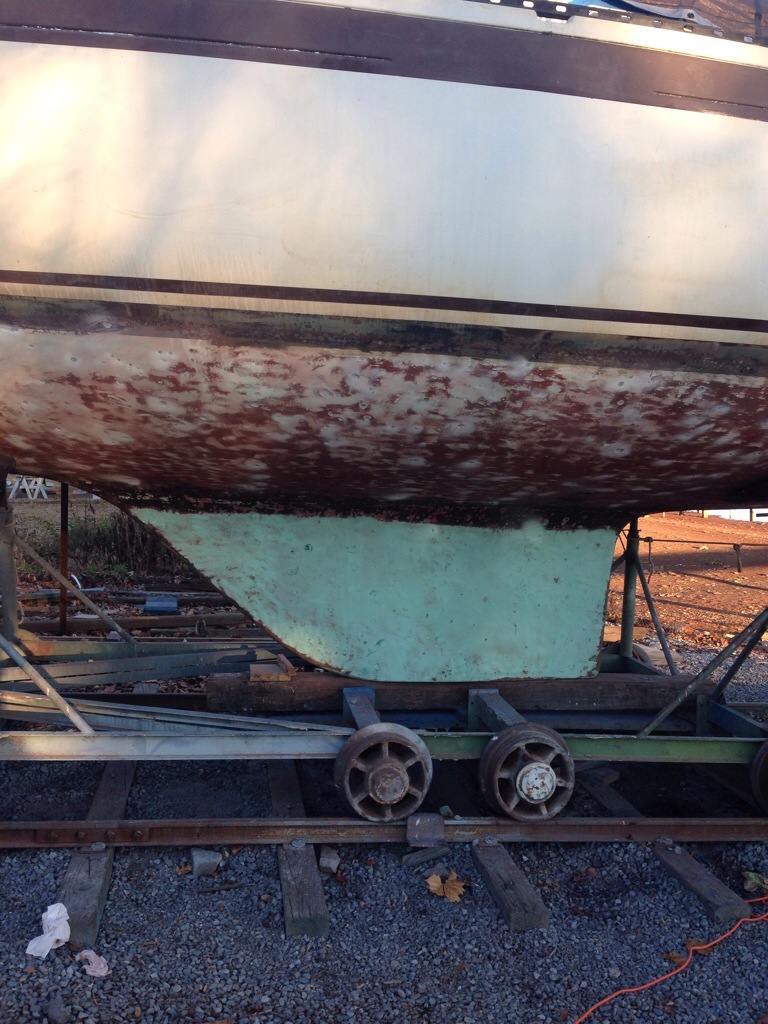
We are still researching the best approach at how to fill the blisters, and what bottom paint to use, if we need a barrier coat, etc. It appears that there is some type of filler used on the keel. On the picture above you can see the difference in color and our best guess is that the gel coat was stripped off the keel and then an epoxy filler was used? Something like that? Yea I’ll check back with Erik about those details… but if anyone has any suggestions on what you would do it would be great to hear some feedback!
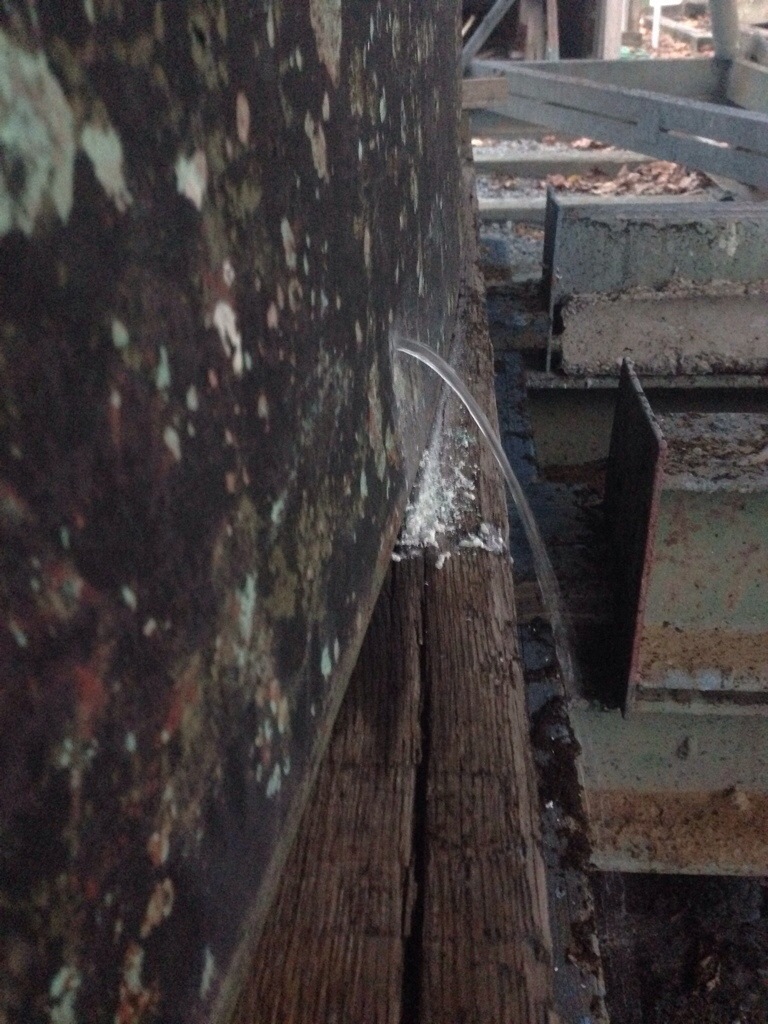
We also drilled a hole in our keel! We have put two and two together and realize that strange grey sandy material in the bilge is most likely our keel filled with concrete. We also noticed that there was constantly water in our bilge, yet now out of the water it is dry. So basically our keel was saturated with water. By drilling this hole we drained the water preventing any potential damage to the keel once it freezes (if it was full of water, froze, the water could potentially crack the keel). This is pretty common, especially up north where owners keep their boats on the hard. Many have installed “keel drains” to drain their boat every year. Since we probably will keep ol’ girl in the tropics and hopefully never pull her out longer than we will this winter, we will just fill the hole in before she goes back in. To remedy the bilge problem we think the best solution will to be build a “new” floor above the old delaminated one. This will be the best approach because it will give us the best opportunity to make a clean seal (with whatever material we end up using). Add that to the to-do list!
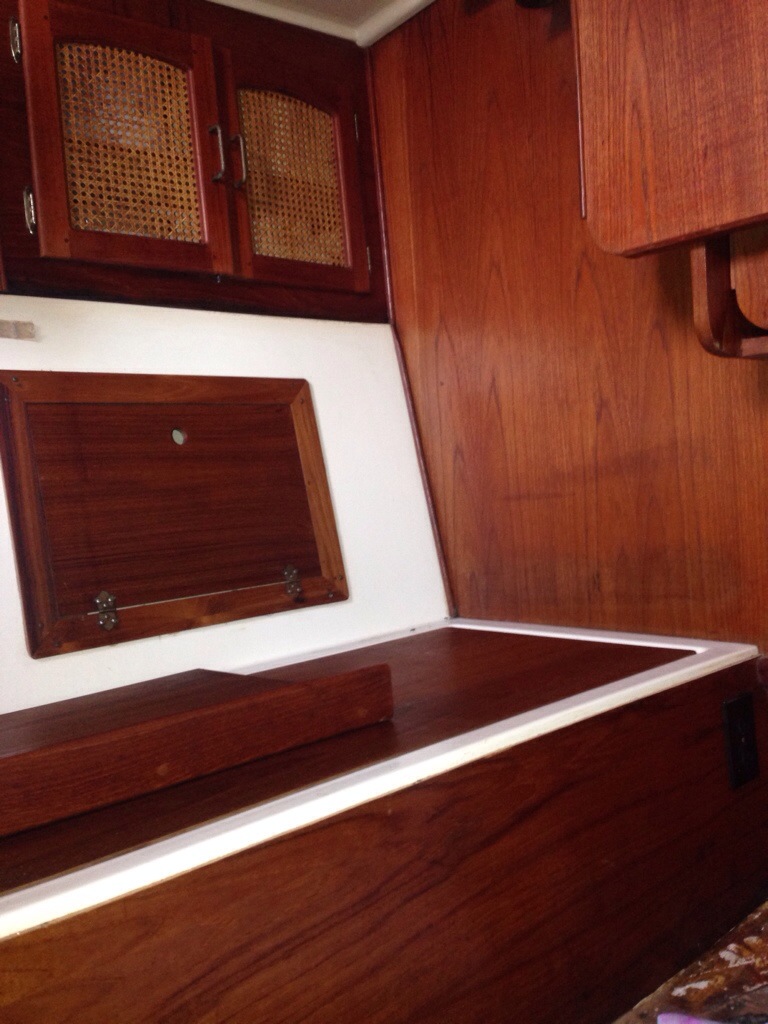
While Erik’s been busy prepping the bottom, I have started oiling the interior wood. I finished the port settee area today, and I think it looks great! I am using an orange oil/beeswax product.
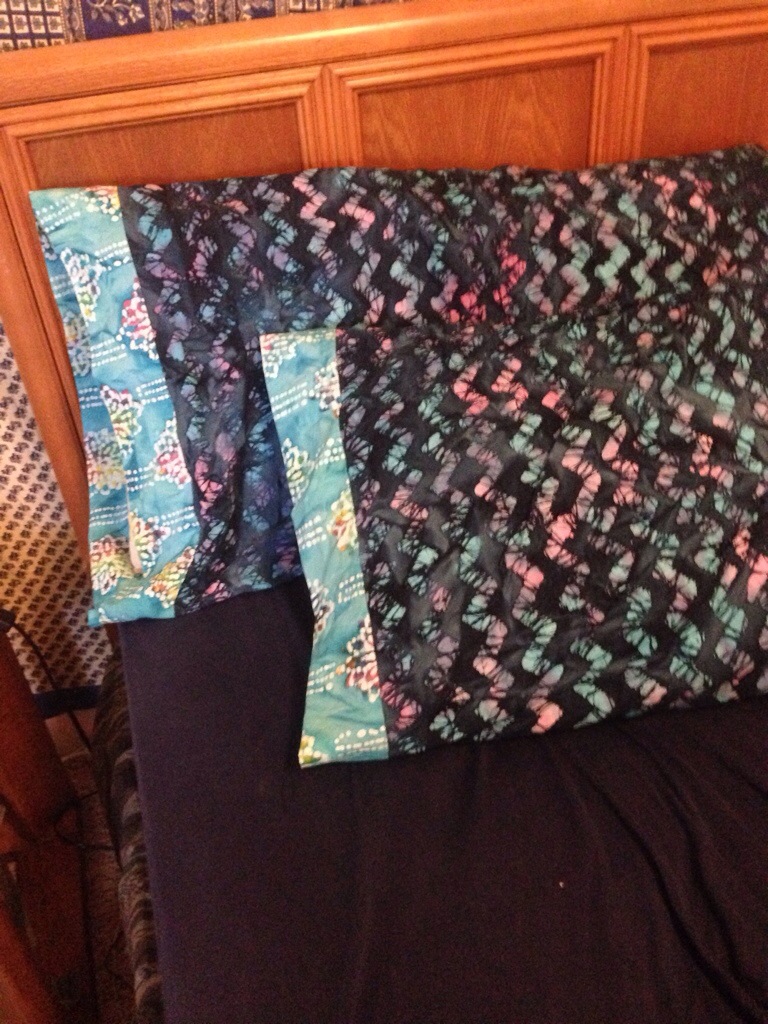
I’ve also acquainted myself with my sewing machine! I made these matching pillowcases for us (so proud, since Erik has a larger than normal pillow, we’ve never had the same cases but I special made him one). And yea I still have some work to do. The only tools I had to make these were scissors and a skinny measuring tape, so even though my line was technically straight, it kind of diagonaled. I ended up having to meticulous re-cut straighterish lines so I ordered a cutting mat, clear thick ruler stick, and a rotary cutter to better prep as I think that will be the key to getting these cushions hammered out.
So yea, I think we are ready for ya December!

Recent Comments