Deck Repair! the BIG project
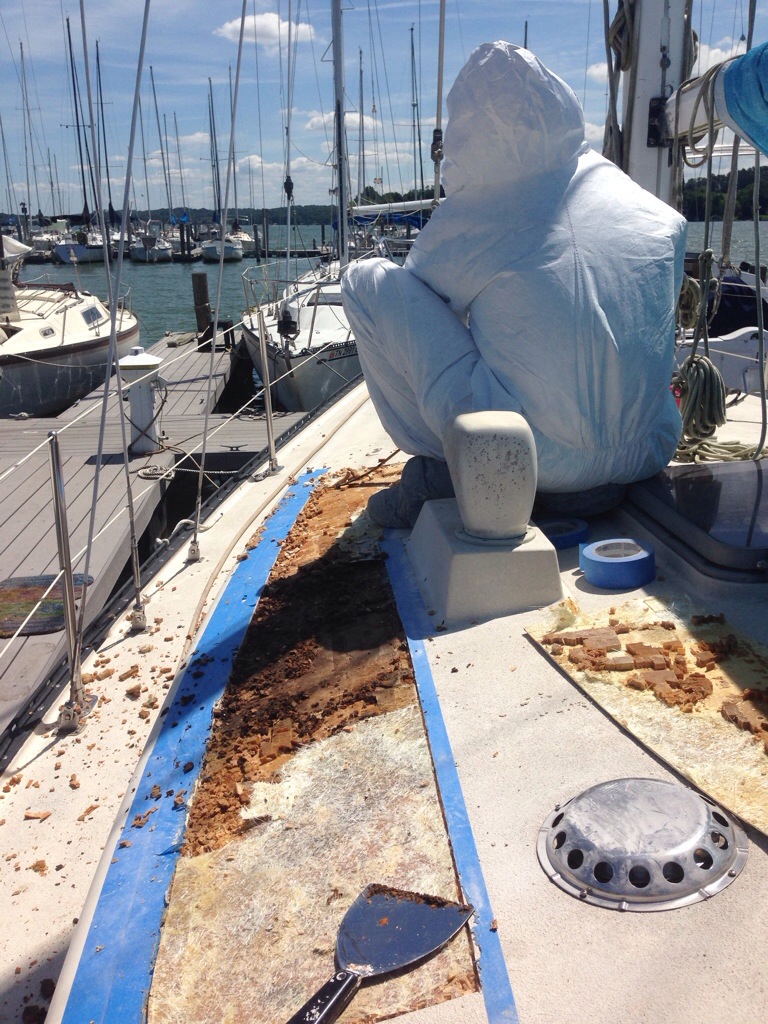
We finally did it! The most daunting and necessary task has been completed! The soft spot on our deck has been ripped out and replaced. We knew when we bought the boat that she had soft spot of rotting core material and we have been researching from the beginning how to fix this problem. After gathering the vast amount of supplies needed, we then had to wait for the weather to cooperate. We really needed ZERO chance of rain since our boat would be cut wide open and all. I never thought it would happen and figured Erik would have to take vacation time to attempt the job(which he already tried to do once, but it rained) but a three day weekend with 0% of precipitation graced us with the perfect opportunity. There are multiple methods and procedures and products and tips and tricks all recommended for a deck core repair, but I will briefly explain what we have done so far. First things first: with a hammer we tapped the deck listening for the dull and dismal sound that rotting wood makes. After we had a good idea of the area we would be working with, we taped off the best square shape we could. This was about 5′ x 1′. Using a circular saw Erik cut out the shape using very shallow cuts. It is important only to go through the first layer of fiberglass. 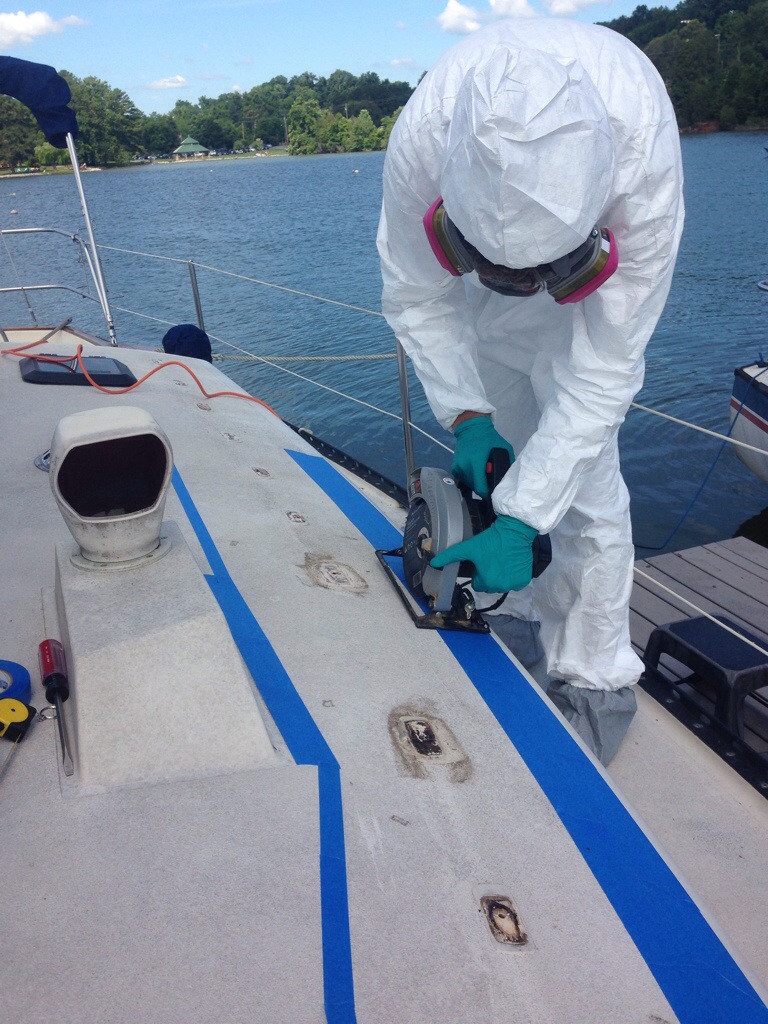
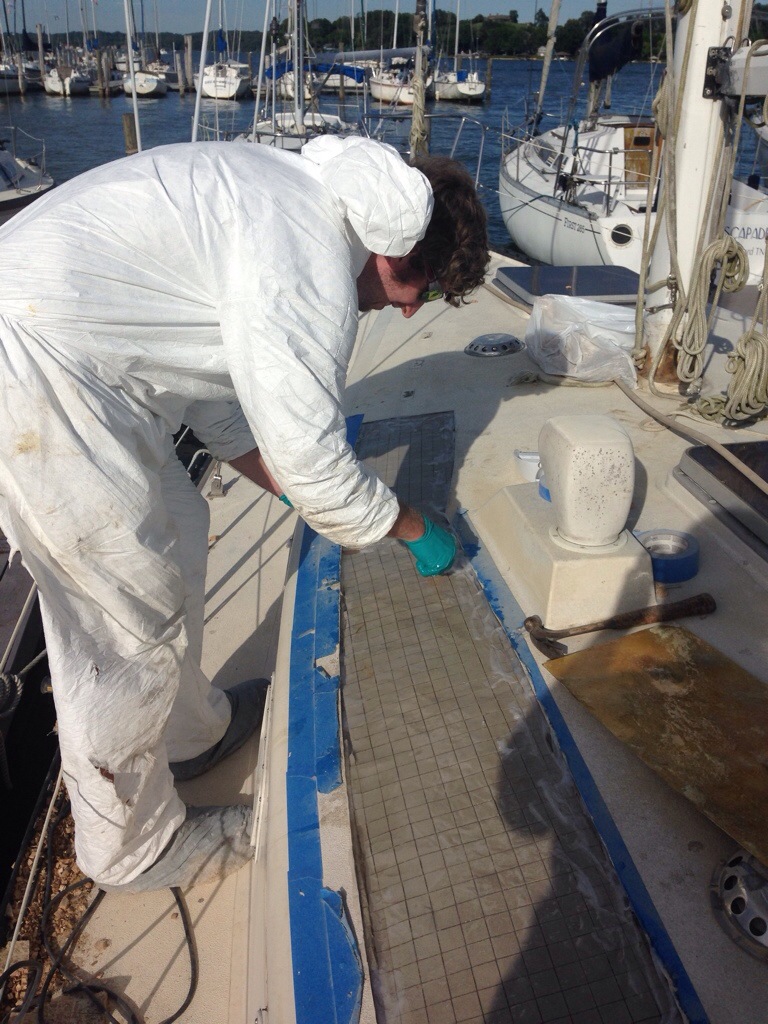
Erik was well prepared for fiberglass work with his suit (and built in booties) and face mask. I, on the other hand, was not as I donned flip flops and shorts. This was a mistake. If you are working on or around fiberglass shards please for the love of all things holy wear some sort of protective clothes and footwear. 
After the incision was made we pried off the top layer of fiberglass. Over the extremely rotted part this was a sinch. However the ends were slightly difficult to lift because it wasn’t in full rot-mode. But I am glad we over cut rather than under cut. A pry-bar and hammer were the best tools for this part. 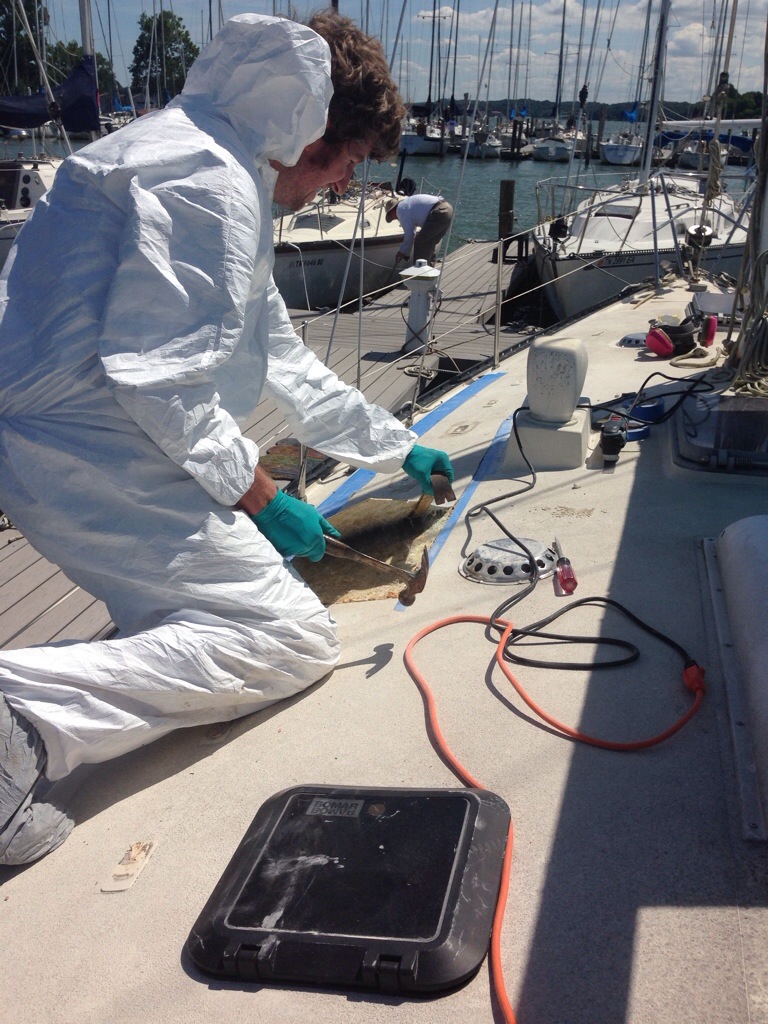
After we got the fiberglass layer lifted off, we started the tedious task of scraping out the old wood. You can see in the picture below the very dark wood that is so rotten, and our edges which were still good.
After scraping out all the wood, Erik used his angle grinder to smooth it all out (he did this on both layers of fiberglass) and cleaned it up with acetone (which dries very fast, great for cleaning damp things) 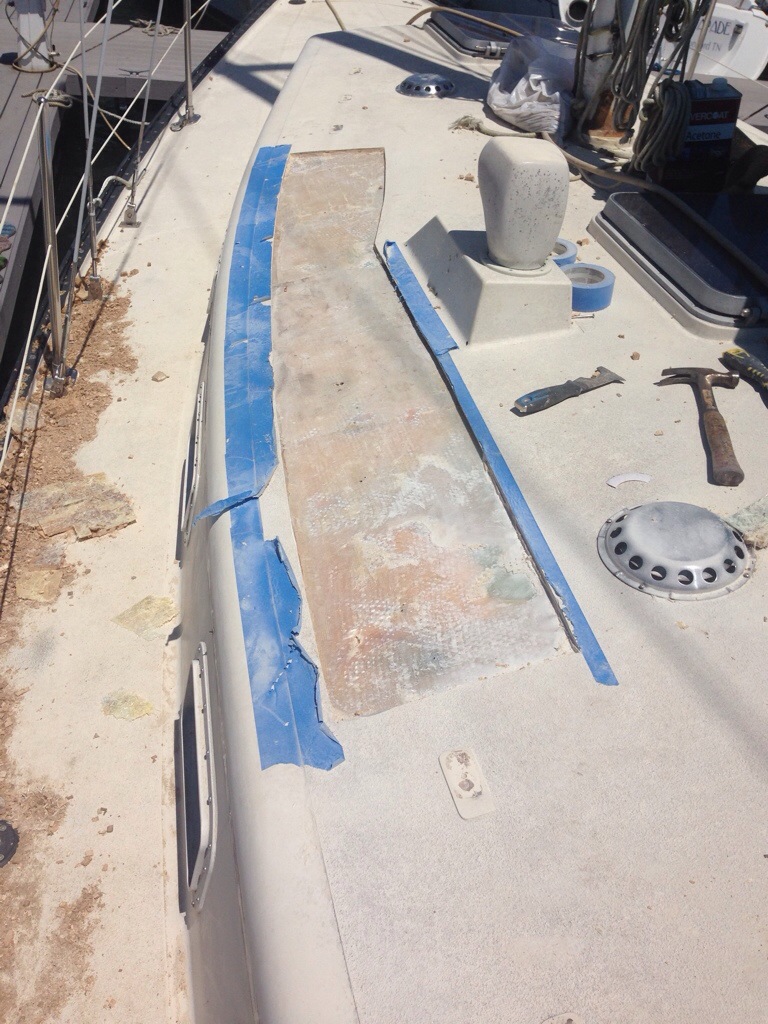
The original core was balsa wood, but we replaced it with divinycell foam. We chose this because it was something sold semi-local (aka shipping costs would have been pricey), it was a small amount (aka most places sold in bulk), and unlike wood it won’t rot in the future! It was a little thicker than our original core so again the angle grinder helped level it out to our deck width. We used less than a gallon of epoxy with respective hardener ratio (3:1 for what we used) and also some silica thickener which turned runny epoxy into the consistency of peanut butter. We smeared the thin stuff on first, letting it seep to the cracks and into the edges, stuck the foam on and the covered in thicker epoxy to help keep it in it’s place.
After a good coat of epoxy we put back the top layer of fiberglass and sealed her up! Whew! We did all of this in one day and it was exhausting. Erik does such good work, I am so proud of him for tackling this terrible task. And while she is watertight now (YAY no more leaky roof!!!!!), we still are not 100% done yet. We will have to “bevel” the edges. Two inches from the seam, on both sides, we will make a little valley and then come back with resin and fiberglass. This final step is crucial to adding strength to the seam. Right now it is fine because we don’t have the handrail for folks to tug on but we will be doing this to give it integrity. 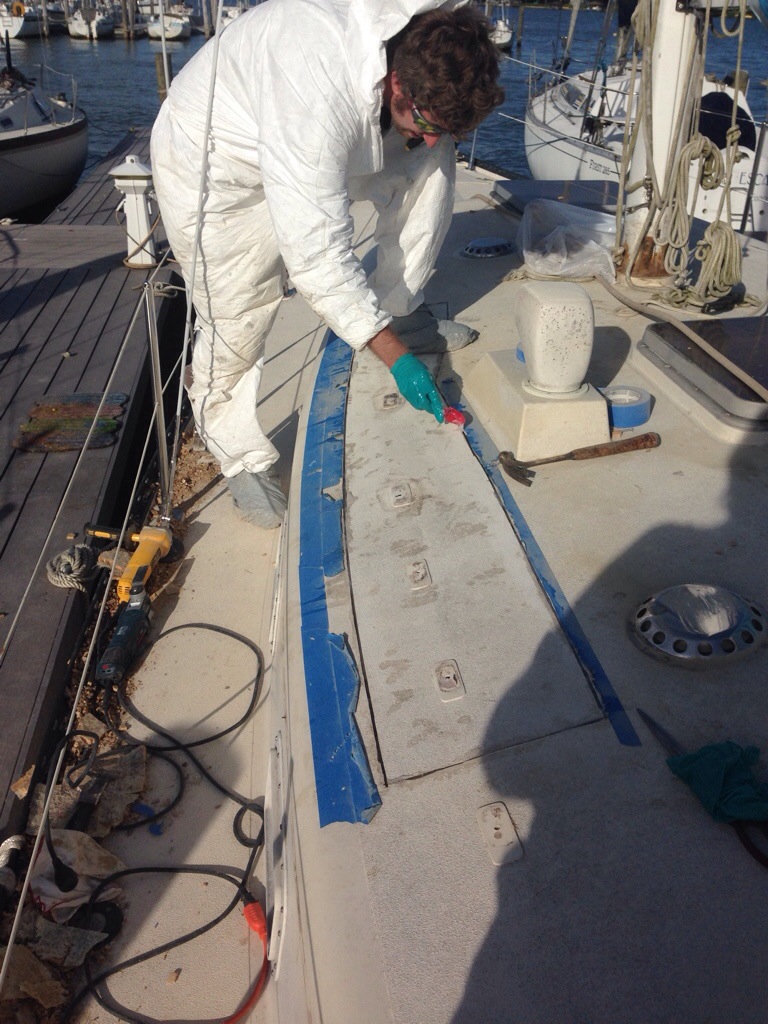
Did I mention the 3 day weekend we worked on this project was 4th of July? That’s right: no better way to celebrate freedom than by working on our vessel. We did all of this on 4th of July. It was nice because the yacht club was having a dinner, and I thought this project would be broken into two leisurely days but we busted through it in just one and made it just in time for dinner. Never mind Erik had to excuse himself from the table to go lay down under a tree from exhaustion, we had a great time! After dinner we headed back to the boat and cleaned up. I enjoyed the fireworks while Erik was still doing work. ahhh freedom.

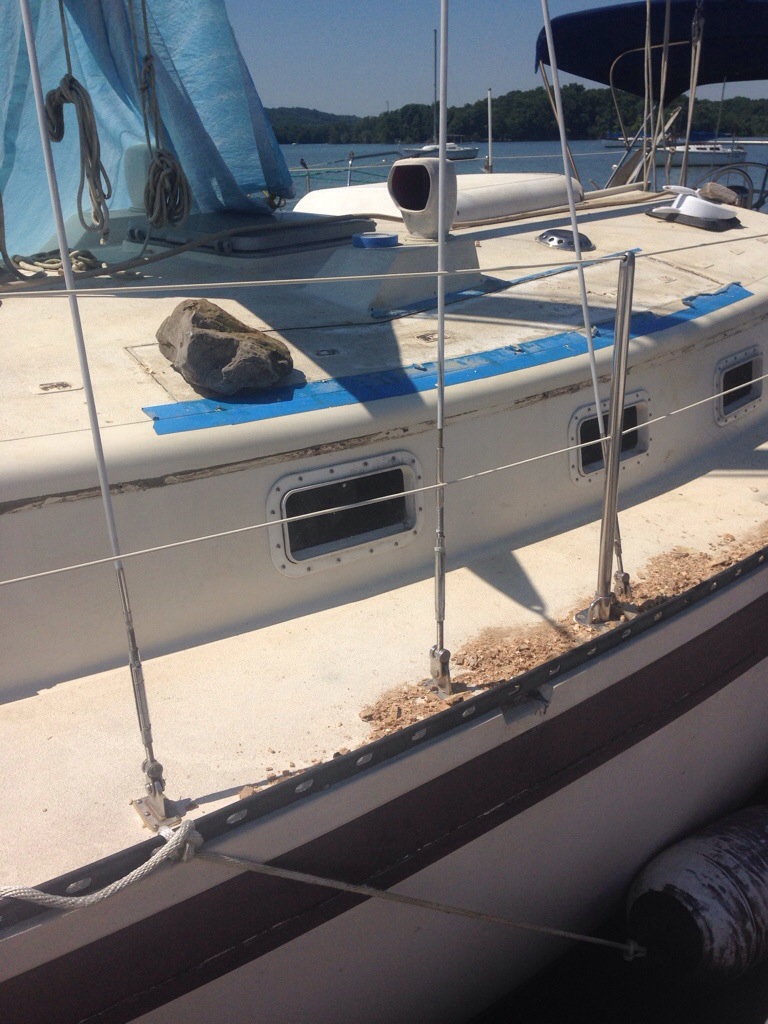
Oh and one more good story… When we were letting the epoxy cure, we weighed the top skin down with a bunch of rocks, from shore. Well as you can imagine (and see in these pictures) it was quite a messy job. And when we came back to the boat the next day, we found that we had epoxied a rock to our boat. I wanted to keep it as a pet, I mean how many sailors have pet rocks that sit on their boat wherever they go…. but alas Erik pried off ol’ Rocky.



I’m with you, I would have kept the rock. Probably would have given it a confusing name like “Pig”. And maybe glued a cow ear onto it.
We recored the foredeck on my wife’s mom’s boat. It went much like you describe above. So I feel that pain. At least you didn’t accidentally step in the epoxy and track it all over the boat. Then it only shows up days later as it yellows in the sun. Fun stuff that.
Keep up the great projects!
Congratulations on your boat. I stumbled across a posting of yours about buying an Aloha 34 this year. We just bought one too in July – sail # 233. So far so good. In fact we’ve owned an Aloha 27 and 32 as well.
Just to let you know there are lots of online help as the owners have an active Yahoo group and a website as well:
http://www.aloha34.com/
Best of luck on the projects. Your work on the deck and the way you’ve presented here is great.
B Hutton – Bronte, Ontario
Thanks! I love getting feedback! We are members of the Aloha 34 group and ask for advice when we stumble upon problems, so hopefully we can help each other out in the future. Glad to see you admire the whole fleet of Aloha boats as I have really enjoyed owning ours so far. We’ve got lots more work to do and I will try to keep posted as it happens. Plans include mast removal, haul out, interior refresh, etc.